Pixelate Image Online
Hide faces, license plates, text, and private details before you share a photo or screenshot. Select with a rectangle or brush, apply pixelate, blur, or a black bar, and download — free, processed only in your browser.
Hide what you need to

Upload your image
PNG, JPG, WEBP or GIF. It is processed locally — your image is never uploaded to a server.
Select what to hide
Drag a rectangle or paint with the brush over each face, plate, or line of text. Add as many regions as you need.
Download
Export a masked copy instantly. The original never leaves your device.
How to hide details safely
- Rectangle or brush selection
- Use the rectangle for anything with straight edges — lines of text in a screenshot, a license plate, an address field on a document. Switch to the brush for irregular shapes like a tilted face, a reflection, or a logo on clothing. You can mix both selection tools in one image and stack as many regions as you need before downloading.
- Pixelate mode
- Pixelation replaces each selected region with a grid of solid blocks, averaging the colors underneath. At medium and high strength it gives the classic mosaic look — clearly censored, visually tidy, and effectively impossible to undo. It is the best default for faces and most personal details in photos and screenshots, and the effect readers expect to see.
- Blur mode
- Blur smears the region instead of blocking it, which looks softer in a polished screenshot or product shot. The trade-off: a light blur over text can sometimes be sharpened back to something readable. If you choose blur for sensitive content, raise the strength until nothing is even faintly legible when you zoom into the preview.
- Black bar mode
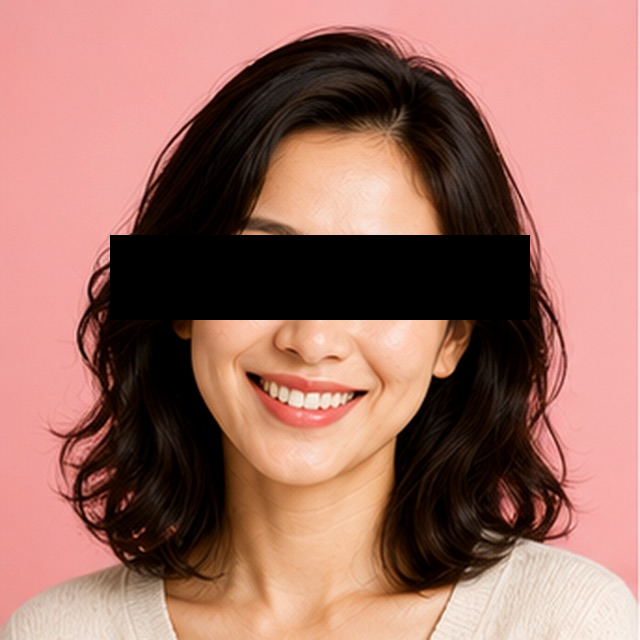
- A black bar overwrites the selected pixels completely — the exported file simply does not contain the hidden information, so there is nothing for anyone to recover. Use it for ID numbers, card details, signatures, addresses, and anything where a leak would have real consequences. It is less subtle than a mosaic, but for critical text that bluntness is a feature.
- Strength slider
- Strength controls the block size for pixelation and the radius for blur. A good test: zoom into the preview and try to read or recognize what is underneath. If you can make out even a hint of it, push the slider higher. Bigger blocks always beat a prettier result when privacy is the point of the edit.
- Which effect to choose
- For faces and general details, strong pixelation is the right balance of looks and safety. For short, high-value text — card numbers, passwords, home addresses — use the black bar. Reserve blur for low-stakes cosmetic hiding, like calming a cluttered background, rather than for anything you genuinely need to keep secret.
Good to hide before posting
- Faces of children and bystanders in group photos
- License plates, house numbers, and street signs
- Names, emails, and order numbers in screenshots
- Account balances and IDs in banking app screenshots
- Documents or screens visible in the background
Handle with extra care
- Very small text — weak pixelation of tiny fonts can sometimes be reconstructed, so use high strength or a black bar
- Reflections in glasses, mirrors, windows, and dark screens
- Details repeated elsewhere — a name hidden in one line may appear again lower in the image
- EXIF metadata such as GPS location — masking pixels does not remove it
When you should pixelate an image before sharing
Most leaks are not hacks — they are screenshots. A support ticket shared with a coworker, a payment confirmation posted to social media, a bug report pasted into a public forum: each one can carry an email address, an order number, a full name, or a home address that was never meant to travel. Taking ten seconds to pixelate an image before it leaves your device is the cheapest privacy protection available.
The same applies to photos. Faces of children and bystanders, license plates, work badges, house numbers, and package labels all identify people and places, and a single storefront or street sign can place a photo on a map. A simple rule: if you would not read the detail aloud to a stranger, hide it before you post. Once an image is public, copies exist forever — you cannot recall it later.
Pixelate, blur, or black bar — which one actually protects you?
The three effects are not interchangeable. Pixelation divides the selected region into blocks and fills each block with the average color underneath. At high strength the blocks are large, the original pixels are gone from the exported file, and the content cannot be reconstructed. At very low strength over small text, though, enough structure can survive that specialized tools have partially recovered characters — which is why a weak mosaic over a password is a known mistake.
Blur behaves the same way: a heavy blur destroys information, a light one merely restyles it. A black bar is the bluntest and safest option — it replaces every selected pixel with solid black, so the download contains no trace of what was there. The practical rule: strong pixelation for faces and general details, a black bar for short high-stakes text, and blur only when nothing critical is at stake.
A privacy checklist before you post a screenshot
Run through this list before a screenshot or photo goes anywhere public. It takes under a minute and covers the details people most often miss.
- Names, usernames, and email addresses — including your own in the corner of the app
- Order numbers, invoice IDs, tracking codes, and account or card numbers
- Faces of anyone who did not agree to be posted, especially children
- License plates, house numbers, and recognizable storefronts near your home
- Browser tabs, bookmarks, notifications, and taskbar icons in desktop screenshots
- Reflections in glasses, mirrors, and dark screens
- The same detail repeated elsewhere in the image — hide every instance, not just the first
Why a browser-based image pixelator is safer than an upload service
Think about what you are censoring: the exact content you do not want anyone to see. Sending that image to a server so it can be hidden is backwards — the unredacted original then sits in someone else’s upload folder, logs, or cache, governed by a retention policy you probably never read. Even a well-run service is one breach away from exposing the very thing you tried to protect.
This image pixelator does all processing locally with browser canvas APIs. The photo you pick never leaves your device: no upload, no server copy, no account. You can load the page, disconnect from the internet, and keep working. For sensitive material, local processing is not a convenience feature — it is the entire point.
How to make an image pixelated for good
Technically, pixelation is block averaging. The region you select is divided into a grid, and every pixel inside each cell is replaced with that cell’s single average color. A 16×16 cell collapses 256 distinct pixels into one value, discarding over 99% of the information in that patch. There is no hidden layer in the exported PNG — the detail is mathematically gone from the file.
To make an image pixelated beyond recovery, size is what matters: the block must be large relative to the detail it hides. A face is safely anonymous when the eyes span only a block or two; a line of text is safe when each character is smaller than one block. When in doubt, raise the strength one more notch — an over-censored image costs nothing, while an under-censored one can cost a lot.
Frequently asked questions
Can pixelation be reversed?
Not at strong settings. Heavy pixelation replaces each block with a single averaged color, so the original detail no longer exists in the file. Only weak mosaics over small text have ever been partially reconstructed — if the content matters, raise the strength or use a black bar.
Is this image pixelator free?
Yes — completely free, with no watermark, no signup, and no limits on how many images you process. There is no paid tier and no locked features; the page is supported by ads instead.
Do you upload my photo?
No. The whole tool runs in your browser using canvas APIs. Your image is never sent to a server, stored, or shared — you can even disconnect from the internet after the page loads and keep working.
Which is safest — pixelate, blur, or black bar?
A black bar is safest because it overwrites the pixels completely. Strong pixelation is a close second and looks less heavy-handed in a shared screenshot. Blur is the weakest of the three for text, so keep it for low-stakes details.
Can I hide more than one area in the same image?
Yes. Drag a rectangle or brush over each face, plate, or line of text — add as many regions as you need, mix different effects in one image, and undo the last selection at any time before downloading.
What file types can I pixelate?
PNG, JPG, WEBP, and GIF uploads all work, and the masked copy downloads as a sharp, full-resolution image with no watermark. Nothing is recompressed on a server, because there is no server involved.
Does pixelating an image remove its metadata?
No — this tool masks what is visible in the picture. Treat EXIF metadata such as GPS coordinates, capture time, and device model as a separate risk, and strip it with a dedicated tool before sharing photos taken on a phone.
How strong should the pixelation be?
Strong enough that you cannot read or recognize anything when you zoom into the preview. For text, each character should be smaller than one block; for faces, the features should dissolve entirely. If you hesitate, go one notch higher.
Can I pixelate a photo on my phone?
Yes. The tool runs in any modern mobile browser. Upload from your camera roll, tap or drag to select regions, and download the masked copy — all processing happens on the phone itself, which is ideal for personal photos.
Why pixelate an image instead of cropping it?
Cropping only works when the sensitive detail sits at the edge of the frame. Pixelating lets you keep the full context of a screenshot or photo — the conversation, the scene, the layout — while removing exactly the parts that identify someone.