JPG to Pixel Art Converter
Turn a JPG into pixel art right in your browser, with defaults tuned for the compression noise and soft colors JPGs carry. Adjust pixel size, colors, and dithering live, then download a clean PNG — free, no signup.
JPG to pixel art in action
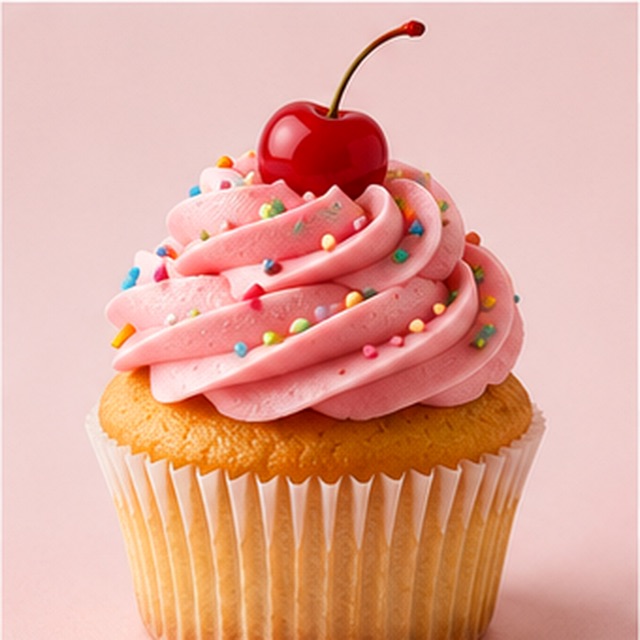
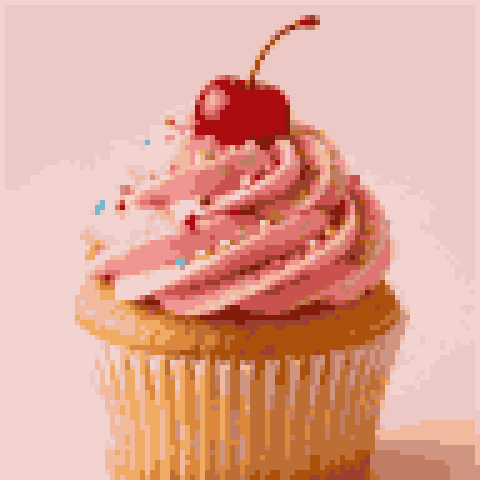
Upload your JPG
Drag in any JPG or JPEG — PNG, WEBP, and GIF work too. The file is processed locally in your browser and never uploaded.
Tune the result
Watch the JPG turn into pixel art live as you adjust size, colors, palette, and dithering.
Download PNG
Export a sharp, lossless PNG with no watermark, ready to use anywhere.
Converting JPG to pixel art cleanly
- Pixel size
- Pixel size sets how many source pixels merge into each output block, and it is your best artifact eraser in a JPG to pixel art conversion. Each block averages dozens of source pixels, so the faint compression grid gets absorbed before it can show. Start around 96–128 px for a photo; if noise still creeps through, step the size down — chunkier pixels hide more.
- Color count
- A clean PNG can afford 32 colors; a compressed JPG usually cannot. Compression smears color across edges, and in a jpg to pixel conversion the quantizer will happily spend palette slots on those smeared in-between tones. Capping the palette at 16–24 colors forces them to merge back into the real colors. If stray green or magenta pixels appear around edges, drop the count a step further.
- Retro palettes
- Instead of letting the converter pick colors from your JPG — artifacts included — you can lock the output to a fixed retro palette like Game Boy or NES. Every pixel snaps to the nearest palette color, so subtle compression tints have nowhere to live. Locking a palette is the fastest way to make jpg to pixel art from a mediocre file look deliberate rather than damaged.
- Dithering
- Floyd–Steinberg dithering keeps skies and skin tones smooth at a small palette, and it is on by default here because most JPGs are photos. The trade-off: dithering treats noise as detail, so it can amplify blockiness near hard edges in a rough JPG. If edges look fizzy, switch to Atkinson — it diffuses less error — or turn dithering off and add a couple of colors back.
- Brightness, contrast, saturation
- Most JPGs are phone photos, and phone photos skew flat. Raising contrast a notch separates the subject from the background before quantization, which matters more than any other fix. A small saturation boost counters the color dulling that repeated JPG saving causes. Do it with the sliders in the converter — they apply before the pixel pass, so the palette is built from the corrected image.
- Export as PNG
- A JPG to pixel art conversion should always end in a PNG download, which is exactly what the converter exports. Saving pixel art back to JPG re-runs lossy compression on hard-edged blocks — the worst possible input for it — and the crisp result you just made grows halos in a single save. PNG is lossless, so your pixels stay exactly as you see them.
JPGs that convert well
- High-quality JPGs straight off a camera or recent phone
- Bright, high-contrast photos with one clear subject
- Portraits and pet photos that fill the frame
- Large files (1,000 px and up) — more data for each block to average
JPGs to fix or replace first
- WhatsApp or Messenger resaves — heavily recompressed; find the original
- Memes saved and reposted many times — artifact-ridden
- Screenshots of JPGs — compression stacked on compression
- Logos or text graphics saved as JPG — use a PNG version if one exists
- Dark, low-light shots — brighten before converting
What JPG compression does to your image
Before you convert a JPG to pixel art, it helps to know what the format already did to your image. JPG is lossy: to shrink file size, it slices the picture into 8×8-pixel blocks and throws away the fine detail inside each one — the detail your eye is least likely to miss at full resolution. It also stores color at lower resolution than brightness, a shortcut called chroma subsampling. The result is faint block seams, soft ‘ringing’ halos around hard edges, and color that smears a pixel or two past where it should stop.
At normal viewing size, none of this matters. But converting a JPG to pixel art runs color quantization — the image is reduced to a small palette, and the converter picks the best few colors to represent everything. Quantization cannot tell an artifact from real detail. A ringing halo earns its own palette color; a smeared edge becomes a fringe of wrong-tinted pixels; the block grid can survive as visible texture in flat areas like skies and walls. That is why a JPG that looks fine full-size can come out noisy as pixel art.
Settings that hide compression artifacts
You cannot remove JPG artifacts, but you can make them irrelevant when you convert JPG to pixel art. Every artifact is small — a pixel or two of ringing, a subtle tint inside a block — so any setting that averages more source pixels together, or gives stray tones fewer palette slots to occupy, hides them.
- Go chunkier. A smaller output size means each pixel block averages more of the source, and the compression grid disappears into the average. If 128 px shows noise, 96 or 64 px usually will not.
- Cut the color count. At 16–24 colors, smeared in-between tones merge into their neighbors instead of earning their own slot. This is the single most effective fix for a rough JPG.
- Rethink dithering. Floyd–Steinberg keeps gradients smooth but treats noise as detail worth preserving, which can amplify blockiness near edges. Atkinson dithers more gently, and turning dithering off entirely suits bold, flat looks.
- Lock a retro palette. A fixed palette snaps every pixel to a known color, so compression tints simply cannot appear in the output.
JPG photos vs JPG graphics
Not every JPG suffers equally. Photos survive compression well: their soft gradients and natural texture hide artifacts, and JPG was designed for exactly this content. When you convert a JPG to pixel art and the source is a decent phone photo, the compression penalty is barely visible.
Sharp-edged graphics are the opposite case. Logos, text, and flat illustrations saved as JPG collect ringing halos along every hard edge — precisely where quantization will pick them up and turn them into fringes of off-color pixels. If a PNG version of the graphic exists anywhere, use it and take the PNG to pixel art route instead; lossless edges convert dramatically cleaner. Fall back to the JPG only when it is genuinely the only copy you have, and lean on a low color count when you do.
When to find a better source
Some JPGs are not worth fighting. Every save re-runs the compression, so an image that has been downloaded, re-shared, and re-saved a few times carries stacked generations of artifacts — meme rot. Screenshots of JPGs are similar: the screenshot captures the artifacts of the original, then often gets compressed again on upload.
Warning signs that a better source will save you time: blocky patches visible in flat areas at full size, mosquito-like specks around edges, and colors that look washed out compared to how you remember the image. A reverse image search often turns up a larger, earlier copy. Two minutes of hunting beats twenty minutes of tweaking sliders on a hopeless file — no jpg to pixel art conversion can restore detail the compression already destroyed.
Step-by-step: clean pixel art from a phone photo
Camera JPGs from a recent phone are high quality, which makes them the easy case for jpg to pixel art. This workflow produces the cleanest result:
- Crop tight. Fill the frame with the subject — a face, a pet, an object. Every pixel block spent on background is a block not spent on the thing you care about.
- Boost contrast and saturation slightly. Phone photos skew flat; a small push separates shapes so the palette lands on your subject.
- Convert at 96–128 px with 16–24 colors. Keep Floyd–Steinberg dithering on for skin and sky — the smooth gradients in a photo are what dithering handles best.
- Check edges at full zoom. If they fizz, switch to Atkinson dithering or drop a few colors. If flat areas show texture, lower the pixel size a step.
- Download the PNG. Do not screenshot the preview or re-save to JPG — either would soften the pixels you just sharpened.
Frequently asked questions
Why does my JPG look noisy after I convert it to pixel art?
That is JPG compression noise being promoted to palette colors. Quantization cannot tell an artifact from real detail, so smeared tones become stray pixels. Lower the color count, reduce the pixel size a step, and raise contrast — the noise merges away.
JPG or PNG — which is better for pixel art?
PNG, when you have the choice: it is lossless, so edges and colors arrive exactly as saved. For photos the gap is small — a high-quality JPG converts nearly as well, because photos are the content JPG stores best.
Does JPEG work the same as JPG?
Yes — JPG and JPEG are the same format with different file extensions, so converting a JPEG to pixel art works identically. The tool accepts both, along with PNG, WEBP, and GIF, and treats them the same.
Can it fix a heavily compressed JPG?
It cannot restore lost detail, but it can hide the damage. Chunkier pixels, 8–16 colors, and a retro palette make most rough JPGs presentable. If the source is a many-times-resaved meme, finding an earlier copy beats any slider.
Is my JPG uploaded to a server?
No. The entire jpg to pixel conversion runs locally in your browser — the file never leaves your device. That makes it safe for personal photos, and it is why the preview updates instantly as you drag the sliders.
What pixel size works best for a JPG photo?
For jpg to pixel art, start at 96–128 so faces and detail stay recognizable. Go lower for a chunkier retro look — smaller sizes also hide compression noise better, since each block averages more of the source.
How many colors should I keep?
For a clean JPG, 16–32 colors keeps skin tones and gradients natural. For a compressed or noisy one, cap it at 16–24 so artifact tones merge into real colors. Drop to 8 for a bold 8-bit poster look.
Should I export as JPG or PNG?
Always PNG. Pixel art is hard edges and flat color — the exact content JPG compresses worst, so one JPG save adds visible halos around every block. The converter exports lossless PNG to keep the result sharp.
Can I convert a JPG to pixel art on my phone?
Yes. The converter runs in any modern mobile browser, and phone camera JPGs are exactly what it is tuned for. Upload from your camera roll, adjust, and download the PNG — no app needed.
Is the JPG to pixel art converter free?
Yes — free with no watermark, no signup, and no limit on how many images you convert. There is no paid tier; the tool runs in your browser, so conversions cost nothing to serve.