Photo to Pixel Art Converter
Turn any photo into pixel art right in your browser — selfies, pets, landscapes — with defaults tuned for photographs: 24 colors and Floyd–Steinberg dithering. Adjust the result live, then download a sharp PNG with no watermark and no signup.
See it in action
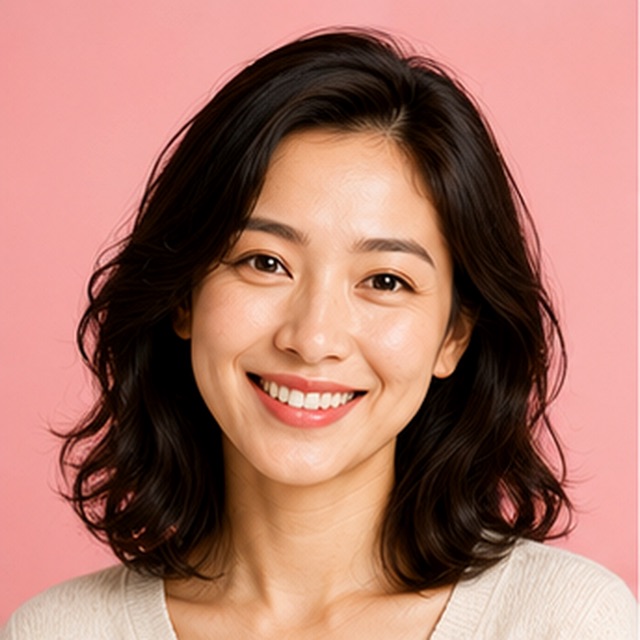

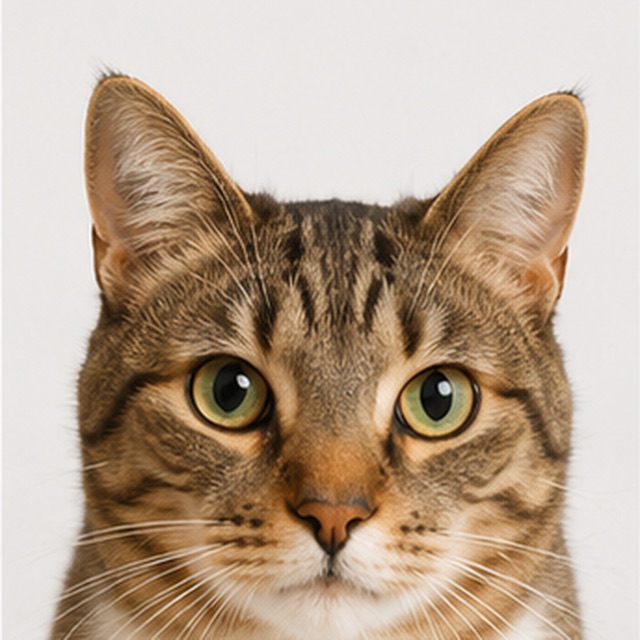
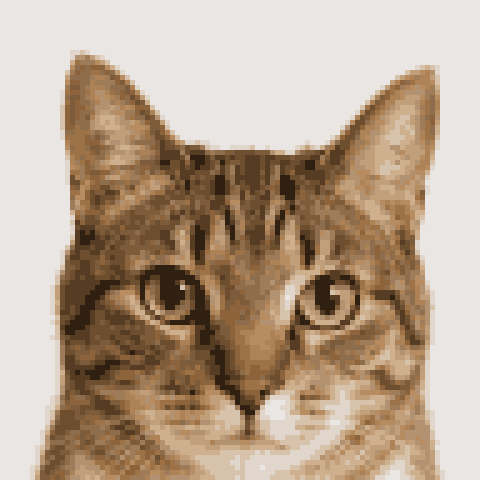
Upload your image
PNG, JPG, WEBP or GIF. Drag, click, or paste — everything is processed locally in your browser.
Adjust the result
Tune the controls and watch the preview update instantly. Nothing is uploaded to a server.
Download
Export a clean, sharp result with no watermark, ready to use anywhere.
How to get cleaner pixel art from photos
- Why photos come out muddy
- A photograph holds thousands of subtle colors and soft, blurry edges. Pixel art wants the opposite: a handful of flat colors and hard edges. When a busy photo gets averaged into a small grid, similar mid-tones collapse into gray-brown mush. Every fix on this page comes down to the same idea — simplify the photo before you shrink it.
- Crop tight before you upload
- The biggest improvement is free: crop. A face that fills the frame might get 60 of 96 pixels across; the same face in a full-body vacation shot gets 15 and turns into noise. Crop to the subject — head and shoulders for portraits, just the animal for pets — and cut busy backgrounds out entirely before you convert.
- Pixel size
- For photos, start at 96–128 pixels on the long edge. A face needs roughly 30 pixels of width to stay recognizable, so size the grid around the subject, not the whole image. The preview updates instantly — walk the size down until the subject breaks apart, then step back up one notch for the chunkiest look that still works.
- Colors
- This page defaults to 24 colors because skin needs room: one face uses 6–10 distinct tones once you count shadows and highlights, and fur gradients on pets behave the same way. Try 16 for a bolder retro look or 32 for smooth landscapes. Below 12, portraits usually posterize into flat orange faces with hard shadow lines.
- Dithering
- Dithering is on by default here (Floyd–Steinberg) because photos are full of gradients — skies, skin, out-of-focus backgrounds. It scatters two nearby colors in a fine pattern so transitions read smooth instead of banded. Atkinson is a lighter, cleaner variant worth trying on portraits. Turn dithering off only when you want flat, poster-style color.
- Brightness, contrast, saturation
- Phone photos are often flat, and flat input makes muddy pixel art. Push contrast up 10–20 points before touching anything else — it separates the mid-tones the converter keeps confusing. A small saturation boost stops colors from graying out at low color counts. Fix these first, then re-tune the color count.
Photos that convert well
- Portraits and selfies with the face large in the frame
- Pets photographed against a plain wall or floor
- Bright, high-contrast outdoor shots with one clear subject
- Product photos and objects on clean backgrounds
- Landscapes with big simple shapes — sky, water, mountains
Photos to fix first
- Group photos — crop to one or two faces first
- Busy backgrounds — crop tight or the subject drowns in noise
- Dark, blurry, or low-contrast shots — brighten and add contrast first
- Fine detail like jewelry, text, or distant faces — it will not survive the grid
- Heavy backlighting — the subject flattens into a silhouette
Why photos are harder to pixelate than logos
A logo is already halfway to pixel art: a few flat colors, sharp edges, simple shapes. A photo is the opposite — continuous tone, soft focus, sensor noise, and lighting that shifts across every surface. To convert a photo to pixel art, the tool has to make two aggressive reductions at once: thousands of colors down to a couple dozen, and millions of pixels down to a grid of maybe 100 × 100.
Both reductions destroy information, and photos hide their most important information in subtle differences — the shadow that defines a nose, the highlight that separates dark hair from a dark background. If those differences are smaller than the color steps the converter keeps, they simply vanish. That is why every practical tip for a photo to pixel art conversion amplifies what matters before the reduction happens — more contrast, tighter crop — rather than trying to repair the output afterward.
How to turn a picture into pixel art that stays recognizable
Recognizability is mostly arithmetic. People can identify a face from surprisingly few pixels, but there is a floor: at about 16 pixels of face width you can tell it is a face, around 30 a specific person becomes clear, and 45 or more preserves expression. So before you turn a picture into pixel art, measure the subject against the grid. At an output width of 96 pixels, a face filling a third of the frame gets about 32 pixels — comfortably recognizable. A face filling a tenth of the frame gets 9 or 10, and eyes, nose, and mouth merge into a smudge that no slider will bring back.
The fix is always one of two moves: crop so the subject fills at least a third of the frame — half is better — or raise the pixel size until the subject clears the threshold. Do the math on the subject, not the image, and the rest of the settings become easy.
Settings for portraits, pets, and landscapes
The photo-tuned defaults on this page — 24 colors with Floyd–Steinberg dithering — are a solid start for everything, but each subject rewards different tweaks:
- Portraits: 96–128 pixel size, 24–32 colors, dithering on. Skin eats colors quickly, so resist going below 16. Atkinson dithering often gives a cleaner, brighter face than Floyd–Steinberg.
- Pets: crop to the animal, then 96 pixels and 16–24 colors. Fur is one long gradient, so keep dithering on, and raise contrast if the coat reads as a single dark mass.
- Landscapes: 128 pixels and 24–32 colors. Skies band badly without dithering, and a small saturation boost makes sunsets and foliage pop at low color counts.
- Night or indoor shots: brighten first. An underexposed picture collapses into three shades of brown at any setting.
Cleaning up a muddy result
Muddy output — gray-brown, low-energy, hard to read — is the most common complaint when people make pixel art from a photo, and it is almost always an input problem. Work in this order:
- Contrast first. Raise it until the subject visibly separates from the background in the preview. This one slider fixes most mud.
- Crop tighter. Background pixels compete for the color budget — every patch of busy background steals a tone the face needed.
- Fewer colors, not more. Counterintuitive, but 16 confident colors often read cleaner than 32 murky ones; mud is too many similar mid-tones, not too few.
- Reconsider dithering. If the result looks noisy rather than muddy, switch Floyd–Steinberg to Atkinson, or turn dithering off and judge the flat version.
What to do with your pixel art photo
The converter exports a clean PNG with no watermark, and because everything runs locally, your original photo never leaves your machine. From there, the popular next steps: scale the PNG up for prints and posters — it stays crisp at any size; run a square crop through the pixel avatar maker for a Discord or Twitch profile picture; rebuild the same photo as a Minecraft block build with a material list; or generate a perler bead pattern and turn your photo into pixel art you can physically iron together. Want a specific retro flavor instead? Apply a built-in Game Boy, NES, or PICO-8 palette after the crop and contrast are right — palettes constrain color hard, so get the structure working first.
Frequently asked questions
Is my photo uploaded anywhere?
No. The conversion runs entirely in your browser — your photo never touches a server and nothing is stored. That makes it safe for personal pictures, kids, and client work alike.
How do I convert a photo to pixel art for free?
Upload the photo above, adjust pixel size and colors if the defaults are not right, and download the PNG. The converter is free with no watermark, no signup, and no export limit.
What is the best pixel size for a photo?
Start at 96–128 on the long edge. A face needs about 30 pixels of width to stay recognizable, so crop tight or raise the size if the subject sits small in the frame.
How many colors should I keep?
The page defaults to 24, which suits skin tones and fur. Use 16 for a bolder retro look, 32 for smooth landscapes. Below 12 colors, most photos posterize hard.
Why does my picture to pixel art conversion look muddy?
Low contrast in the source. Raise contrast, crop tighter, and try fewer colors — 16 confident colors usually beat 32 murky ones. Keep dithering on so gradients stay smooth.
Can I turn a picture into pixel art of my pet?
Yes — pets convert well. Crop to the animal, keep 16–24 colors, and leave dithering on for fur gradients. Boost contrast if the coat is very dark or very light.
Can I make pixel art from a photo in a Game Boy style?
Yes. Convert with the photo defaults first, then apply the Game Boy palette — or NES, PICO-8, and other retro palettes. Palettes work best once crop and contrast are already right.
Is photo to pixelart the same as pixelating a photo?
No. Converting builds a deliberate retro image with reduced colors and a clean grid; pixelating just blurs a region into big blocks, usually to censor it. This page does the first — use the pixelate tool for censoring.
Does it keep a transparent background?
Transparent PNGs stay transparent through the conversion. A regular photo keeps its background — crop it out or remove it beforehand if you only want the subject.
Is the result really free, with no watermark?
Yes. Every download is a clean PNG with no watermark, no signup, and no paid tier. The tool runs on your own device, so there is no server cost to pass on.
Related pixel tools
The general converter for logos, art, and any image.
Turn a selfie into a square profile picture.
Blur or block out a face or private detail instead.
Turn a photo into a Minecraft block build.
Turn a photo into a printable bead pattern.