Image to Pixel Art Converter
Convert any image to pixel art right in your browser – set the pixel size, cap the colors, lock a retro palette, and preview instantly. Download a sharp PNG with no watermark, no signup, and nothing uploaded to a server.
See it in action
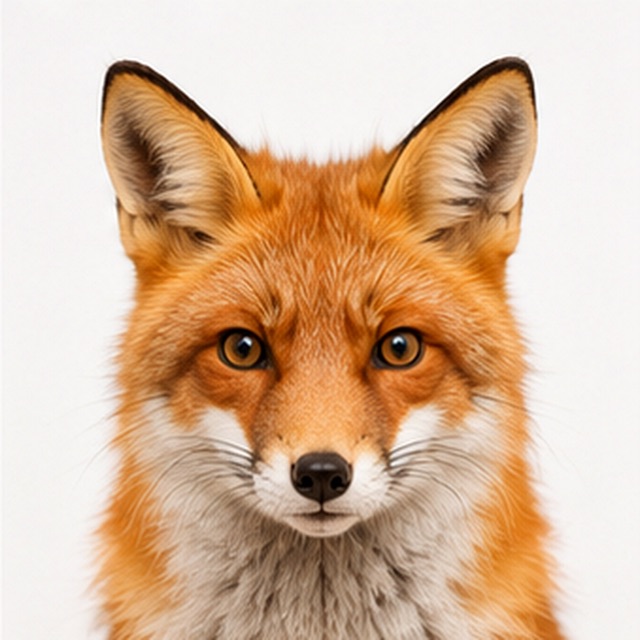
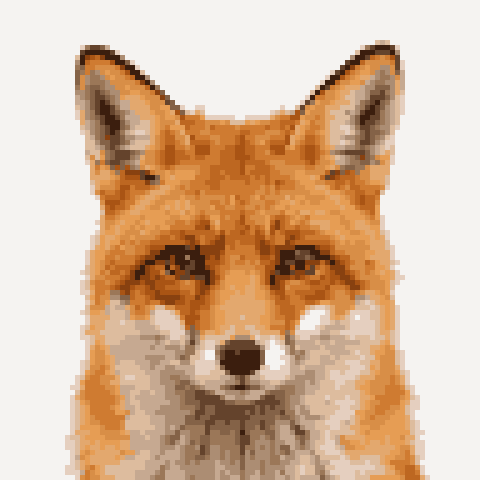
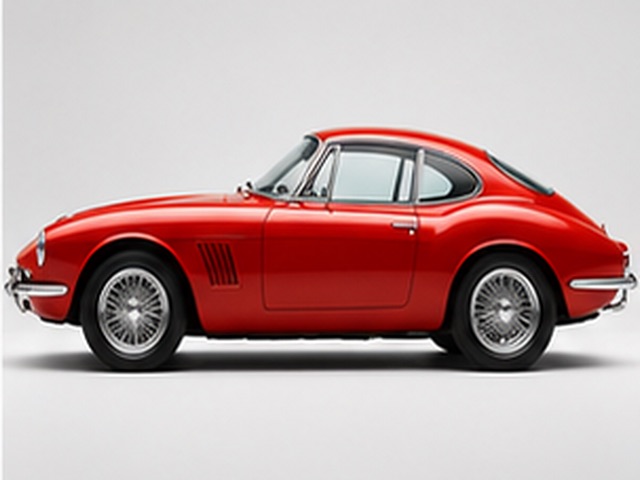
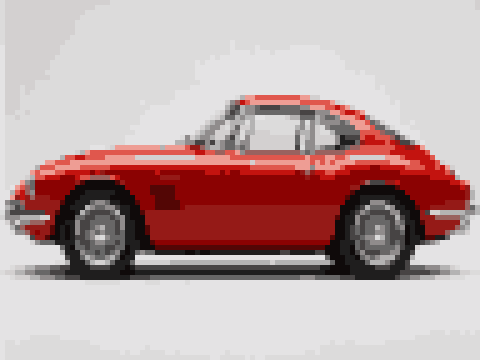
Upload your image
PNG, JPG, WEBP or GIF. Drag, click, or paste — everything is processed locally in your browser.
Adjust the result
Tune the controls and watch the preview update instantly. Nothing is uploaded to a server.
Download
Export a clean, sharp result with no watermark, ready to use anywhere.
How to get clean pixel art
- Pixel size
- Pixel size sets the width of the grid your image is redrawn on – 32 means 32 blocks across, 128 keeps far more detail. Lower values look bold and abstract; higher values stay closer to the source. For most images, 64–128 is the sweet spot: start at 96 and step down until the shapes still read clearly. Faces usually need at least 64 pixels of width to keep the eyes readable.
- Colors
- With the palette set to Auto, this slider caps how many colors survive quantization. Classic pixel art reads best at 8–24 colors – fewer colors force similar shades to merge into clean, flat shapes. If your result looks noisy or muddy, cutting the color count is the fastest single fix, faster than changing anything else. The cap is ignored once you lock a fixed retro palette, since those bring their own color sets.
- Palette
- Auto builds a palette from the colors already in your image, which keeps the result faithful to the original. Locking a retro palette instead remaps every pixel to a fixed set: Game Boy (4 greens), PICO-8 (16 colors), Sweetie 16, NES, or 1-bit black and white. Fixed palettes give an instantly recognizable era look, and they keep everything consistent when you create pixel art from images in a series – avatars, game assets, matching thumbnails.
- Dithering
- Off produces flat, poster-like blocks of color – best for logos and hard-edged art. Floyd–Steinberg scatters two palette colors in a fine pattern to fake in-between shades, which rescues skies, skin, and metal when the color count is low. Atkinson, borrowed from the original Macintosh, spreads less error, keeps highlights brighter, and looks cleaner on small grids. Toggle each option and compare – the preview updates instantly.
- Brightness, contrast, saturation
- These three sliders run before quantization, so they change which colors the converter picks – not just how the result looks. Raising contrast is the most useful move: it separates the subject from the background so shapes survive the low resolution. A small saturation boost counters the washed-out look photos often get on small palettes, and a brightness lift stops dark photos from collapsing into a few murky tones.
- PNG export
- Download exports a lossless PNG upscaled with hard, nearest-neighbor edges to at least 512 px on the short side, so every pixel stays a razor-sharp square instead of smearing into blur. There is no watermark and no quality cap. You can also re-upload an exported file and run a second pass – handy for trying a different palette on a result you already like.
Works great
- High-contrast images with one clear subject – silhouettes survive any pixel size
- Logos, icons, and flat illustrations – few colors means almost nothing is lost
- Concept art and screenshots you want to mock up as game sprites
- Pet, car, and landmark photos after a tight crop around the subject
- Anything where bold shapes matter more than fine detail
Needs a tweak first
- Photographs with busy backgrounds – crop to the subject first
- Fine text and thin lines – anything under about 5 pixels tall blurs away
- Low-contrast or hazy images – raise the contrast slider before converting
- Very dark photos – lift brightness so the shadows do not merge into one block
What makes a good image to pixel art conversion
Pixel art is not just a small image – it is an image where every remaining pixel is a deliberate square of color. When you convert an image to pixel art, two numbers decide almost everything: grid resolution and color count. A 64-pixel grid holds 4,096 cells; a 128-pixel grid holds four times as many. The more cells you spend, the more detail survives – but past a point the result stops reading as pixel art and starts looking like a slightly blurry photo.
The trick is to find the lowest resolution at which your subject is still recognizable. A face needs roughly 48–64 pixels of width to keep the eyes and mouth readable. A car silhouette survives at 32. A full landscape usually wants 128 or more. Start high, step down, and stop one step before the subject falls apart – that last readable step is where pixel art from an image looks most intentional.
Choosing a retro palette – Game Boy, NES, or PICO-8
An auto palette stays faithful to your source, but a fixed retro palette is how you make pixel art from an image that looks like it shipped on real hardware. Each preset carries its own era:
Whichever you lock, pair a small palette with dithering – even four greens can carry a surprising amount of shading once Floyd–Steinberg is on.
- Game Boy – four shades of green, the harshest constraint and the strongest style. It flattens any photo into moody monochrome; best on portraits and high-contrast subjects.
- NES – 16 colors drawn from the 1985 console. A good middle ground for scenes and characters that should feel like an 8-bit game screenshot.
- PICO-8 – the 16 bright colors of the fantasy console. The go-to for game-jam assets and anything that should look modern-indie rather than vintage.
- Sweetie 16 – a balanced 16-color set loved by pixel-art communities. The safest pick when you simply want a clean, tasteful color reduction.
- 1-bit – pure black and white. Pair it with Atkinson dithering for a classic Macintosh look.
Dithering, explained
Dithering alternates two palette colors in a fine pattern so your eye blends them into a third. With only 8 or 16 colors, a sunset would normally band into ugly stripes; dithering breaks every band edge into a checkered transition and the banding disappears. It is the oldest trick in pixel art, and it is how Game Boy games showed shading with four colors.
This converter ships two error-diffusion algorithms. Floyd–Steinberg pushes each pixel’s rounding error onto four neighbors, producing dense, smooth texture – the default choice for photos. Atkinson spreads only part of the error, so highlights stay brighter and the pattern stays sparser, which often looks cleaner on grids of 64 pixels or fewer. Leave dithering off for logos, UI mockups, and flat illustration, where the speckle reads as noise rather than shading.
Image to pixel art converter vs drawing by hand vs AI
Hand-drawn pixel art gives the best possible result – an artist places every pixel with intent, and no algorithm matches that. It also takes hours per sprite and years of practice. An image to pixel art converter trades a little of that polish for ten seconds of work, which makes it the right tool for avatars, craft patterns, mockups, and any case where you already have the image you want.
AI pixel-art generators occupy a third spot: they invent new images from a text prompt, which is useful when you have no source image at all. But they are slower, usually metered or paid, and notoriously bad at honoring an exact grid – many AI outputs have uneven pixel sizes that fall apart when scaled. When you already have a photo or artwork, a deterministic, free pixel art converter running in your browser is faster, private, and pixel-exact.
Common mistakes when you turn an image into pixel art
Most disappointing conversions come from the same few habits, and each has a quick fix:
- Resolution too high. A 256-wide grid is just a low-quality photo. If the result does not obviously read as pixel art, halve the pixel size and look again.
- Skipping the crop. The converter spends pixels on everything in frame. Crop until your subject fills at least two thirds of the image before uploading.
- Too many colors. Forty auto colors hide the structure. Drop to 12–16 and the shapes snap into focus.
- Dithering everything. On flat logos and icons the pattern reads as dirt. Reserve it for gradients and photographic shading.
- Judging at thumbnail size. Pixel art is meant to be scaled up. Download the PNG – it exports sharp at 512 px or larger – before deciding a setting failed.
Frequently asked questions
Is this image to pixel art converter really free?
Yes – every feature is free: retro palettes, dithering, adjustment sliders, and PNG export. There is no signup, no watermark, and no daily limit. It is a genuinely free pixel art converter, supported by ads rather than paywalls.
Do you upload my image to a server?
No. The conversion runs entirely in your browser on a canvas – your image never leaves your device. That also means large files convert instantly, with no upload wait and no privacy trade-off.
Can I convert a photo to pixel art, or only drawings?
Both work. Photos benefit from a tight crop and a contrast boost before converting, since busy backgrounds eat up the limited pixels. For portraits and pets, the Photo to Pixel Art page walks through a workflow tuned specifically for photographs.
How do I turn an image into pixel art for a game?
Convert at the exact resolution your engine expects – commonly 32, 48, or 64 – and lock one palette so every asset matches. The exported PNG upscales cleanly at any integer multiple, so a 32-pixel sprite stays sharp at 320 px.
What pixel size should my pixel art be?
Start at 96 and lower it until the shapes stop reading cleanly, then go back one step. Faces need about 48–64 pixels of width; simple logos survive at 32; detailed scenes want 128.
When should I turn on dithering?
Turn it on for gradients and smooth shading – skies, skin, metal, sunsets – especially with 16 or fewer colors. Leave it off for flat logos, icons, and hard-edged art, where the pattern reads as noise. Try Atkinson when Floyd–Steinberg looks too busy.
Which retro palette should I pick?
Game Boy for moody four-green monochrome, NES for authentic 8-bit game color, PICO-8 for bright modern-indie work, Sweetie 16 for a clean general-purpose reduction, and 1-bit for stark black and white. Auto is best when you want to stay faithful to the original image.
What formats can I upload, and what do I get back?
PNG, JPG, WEBP, and GIF all work as input. Output is a lossless PNG, upscaled with hard pixel edges to at least 512 px on the short side – ready for avatars, printing, or game engines.
Why does my pixel art look blurry or muddy?
Almost always too many colors or too high a resolution. Cut the colors to 12–16 first, then lower the pixel size. If the subject and background blend together, raise the contrast slider – it runs before color-picking, so it changes which colors are kept.
Can I use the pixel art commercially?
Yes – you own what you export, and nothing is watermarked. Just make sure you hold the rights to the source image you upload, since converting an image does not change its copyright status.
Related pixel tools
A conversion workflow tuned for portraits, pets, and busy photographs.
Square-crop any image into a sharp pixel avatar for social profiles.
Rebuild your image in Minecraft block colors with counts and a blueprint.
A printable grid and color legend for beads, cross-stitch, and crafts.
Blur or block out faces and private details before sharing.